 It came at me from all sides.
I can’t tell you how many people recommended that I try Artisan Bread in 5 Minutes a Day, a technique of bread baking that requires zero kneading and truly makes bread simple. I got the book from the library long ago and read up on Jeff Hertzberg and Zoe Francois’s basic method, then finally my friend Shannon insisted that I just come on over for a lesson. “We’re making bread,” she said. “You have to see how easy this is.”
Who am I to pass up an invitation for lunch?
While the kids became pirates and played under the stairs, we baked and mixed and talked food. The loaf we created was gone after a delectable lunch of grilled cheese, and I remained impressed at how easy it was.

The original book has a 100% whole wheat sandwich bread recipe, which is what we made, and the authors’ new book, Healthy Bread in Five Minutes a Day, has 100 new whole grain and gluten-free versions. (Funny thing – I just won that book last week from the Foodie blogroll (link no longer available), so I’ll get to experiment with new recipes in a few weeks!)
The new recipe includes 1/4 cup vital wheat gluten and part white flour, which will improve the rise considerably. I know some people are wary of using extra gluten regularly because of the risk of developing celiac disease, a gluten allergy, so I decided to play with the original recipe in my kitchen. The bread is NOT at all “healthy whole-grain-y” tasting or heavy at all, but it does turn out a bit dense and tough to get the middle all the way baked.
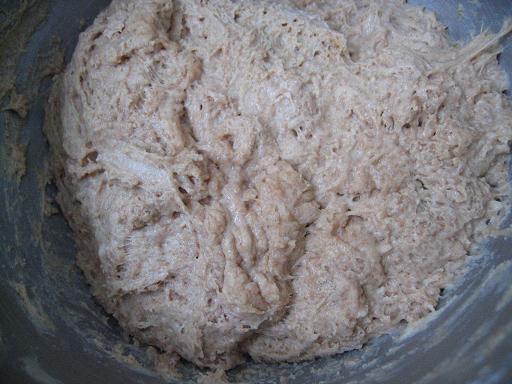
I need a little work perfecting the method, myself, because you’re not supposed to knead or work the bread at all, and I keep messing with it more than I should! You can see the steps with photos here. It’s really a great, easy way to accept this week’s Monday Mission, bake your own bread.
Original 100% Whole Wheat Artisan Bread in Five Minutes a Day Recipe
Ingredients:
1 1/2 C cold milk
1 1/2T yeast
1T & 1tsp salt
1/2C Honey
5T neutral flavored oil
6 2/3C WW flour ( I used naturally white soft WW, it’s a little lighter and makes a fluffier bread than hard WW)
Method:


With wet hands take a hunk out the size of a cantaloupe. Shape it into a ball by stretching the surface of the dough around to the bottom on all four sides, rotating the ball a quarter turn as you go. Bake free form or in a greased loaf pan. Loaf pan should be slightly more than half full. Slash the top of the bread with a very sharp serrated knife to allow it to expand better.
Let dough rest and rise 1 1/2 –2 hours.

Preheat oven to 350 along with your baking stone if using, and pour 1-2C water into your METAL broiler pan at the bottom of the oven. Bake 40-50mins. Smaller loaves cook up much quicker so keep your eye on the bread and take it out when the crust is a nice deep golden brown.
You store the remaining dough in the refrigerator and simply grab a hunk when you want bread, form a loaf and allow it to rise a few hours. It keeps for 5-7 days. One batch is enough for about three loaves, and you can make pizzas or many other kinds of bread with the same master recipe. The fact that it’s waiting for you in your fridge after the 5-10 minutes you spend making it is the “five minutes a day” magic!
Here are the notes Katie would add to the baking instructions:
- Be sure to use melted butter or coconut oil for the fat, not canola or other unhealthy industrial oils.
- White whole wheat or traditional work great; I prefer a half-and-half mixture myself.
- Always heat water on the stovetop to get it hot; it’s not recommended to use hot tap water because hot water is more likely to leach lead and other problematic substances from your pipes.
- Alternately, you could allow the milk and water to come to room temperature and proceed from there. The hot water counteracts the cold milk for my friend who doesn’t want to wait for room temp ingredients.
- Non-chlorinated water always works best for bread. I’ve started leaving a jar of tap water on my counter at all times for bread and water kefir; leaving it open for 4-6 hours should allow the chlorine from the city water to evaporate out.
- If you don’t have a broiler pan, never use a glass pan!! Shannon did and it exploded in her oven. Only metal, folks. A cast iron pan will do fine.
- You can freeze the dough. Just thaw in the fridge overnight and allow for a nice long room temperature rise when you want to bake.
- You can use freshly ground wheat, according to the authors’ website. More on the health benefits of milling your own flour tomorrow!

Whole Wheat Artisan Bread in 5 Minutes a Day
- Category: Bread
Ingredients
- 1 1/2 c. hot water
- 1 1/2 c. cold milk
- 1 1/2 Tbsp yeast
- 1 Tbsp & 1 tsp salt
- 1/2 c. honey
- 5 Tbsp neutral flavored oil (like refined coconut oil (use the code STEWARDSHIP for 10% off at that site!))
- 6 2/3 c. whole wheat flour (I used naturally white whole wheat, it’s a little lighter and makes a fluffier bread than hard whole wheat)

Instructions
- Mix the water, milk, salt (Use the code kitchenstewardship for 15% off of your first purchase) and yeast until the yeast isn’t in a big chunk anymore. Add in the remaining ingredients and mix the whole thing together until uniform, but don’t knead or over work it. Cover and let rise for 2-3 hours.
- With wet hands take a hunk out the size of a cantaloupe. Shape it into a ball by stretching the surface of the dough around to the bottom on all four sides, rotating the ball a quarter turn as you go. Bake free form or in a greased loaf pan. Loaf pan should be slightly more than half full. Slash the top of the bread with a very sharp serrated knife to allow it to expand better.
- Let dough rest and rise 1 1/2 –2 hours.
- Preheat oven to 350 along with your baking stone if using, and pour 1-2C water into your METAL broiler pan at the bottom of the oven. Bake 40-50mins. Smaller loaves cook up much quicker so keep your eye on the bread and take it out when the crust is a nice deep golden brown.
- Need a little help getting healthy food on the table every day? Real Plans takes the stress out of meal planning and puts the nourishing food BACK on your table. There’s a plan for every diet type, including GAPS, Paleo, AIP, Whole30, vegetarian and more! You remain totally in control: use your own recipes, accept theirs, and teach the system what your family likes…Check out how powerful it is here!
Can You Soak Artisan Bread?
You knew I’d ask that question, right? I think that was my initial hang-up with the method; I was just getting into soaking and sourdough, and I didn’t want to take a potential step backward in nutrition, even if it was easier. (If you haven’t been around KS lately, catch up on the soaking grains research.)
Jen at the Leftover Queen mentioned that she successfully soaked the olive oil bread recipe, so I jumped in to try to soak the master whole wheat recipe. The results were a bit sticky and an expected *fail*, but the reviews at the table last night included, “Mmmm, this is really good bread!” from the in-laws, so I guess it worked out alright! Here’s what I did:
Soaked Artisan Bread Attempt:
- Mixed 1 1/2 cups milk, 1/2 cup whey, 1/2 cup water with all the flour overnight. I threw in a little extra water because usually soaked breads need that, but that was an “oops”.
- Allowed to rest overnight.
- Stirred together 1/2 cup warm water, with the yeast, salt, honey and melted butter, shooting for about 110 degrees.
- I combined that mixture with the soaked flour. It was a mess! I had decided to try mixing with only a spoon to prove that you could in fact do this without fancy equipment like a KitchenAid mixer, (and you can without soaking!), but I ended up just mixing with my hands because it’s a tough thing to get water mixed in with something that already has the consistency of bread dough.

On my next soaked attempt:
- I will add the melted butter, and maybe half the honey, in the soaking step and go shy on the liquid until I saw the consistency.
- I will use my KitchenAid! There are reasons I never baked bread by myself, and mixing the ingredients is one of them. I love machines. 😉
- On the other hand, research shows that a rise with yeast does, in fact, reduce the phytates, although not as much as sourdough. My friend Shannon says she’s often made the dough right before bed and left it over night with no problem. I’m thinking just using the whey in place of 1/4-1/2 cup water and allowing the first rise to be about eight hours would suffice for “soaking”.
- Shannon has also forgotten the second rise and left if MUCH longer with no problems, which would again work to make the bread more digestible. Perhaps simplicity and laziness is the way to go with soaked Artisan Bread in Five!
Want to try it yourself? I’m so blessed to be able to give away BOTH Artisan Bread in Five Minutes a Day and Healthy Bread in Five Minutes a Day to my readers! Head over to the blogoversary celebration giveaway post to sign up (comments on this post will create a conversation about the Artisan in 5 method but will not count as an entry in the giveaway.) GIVEAWAY NOW CLOSED.
Have you made bread with this method? Do tell, especially if you’ve attempted a “soak” or found that you can leave it at room temp for a long time.
I was not provided with any products for this review, but the publisher is providing copies of the books as giveaway prizes. There are Amazon affiliate links in this post. See my full disclosure statement here.
Love to join up with Real Food Wednesday at Kelly the Kitchen Kop and Works for Me Wednesday at We are THAT Family. See Life as MOM for lunchtime ideas and Yeastspotting for loads of bread recipes.
I’m well known for honest, thorough product reviews…

…and you can always tell a real family has run these products through the gauntlet.
When I review a type of item, I try to review a LOT of different brands! From over a dozen reusable sandwich bags to over 120 natural mineral sunscreens, I’m your girl for straight-up info about natural, real foodie items you’re considering buying.
Click here to see more product reviews and you’ll also love my resources page, with REAL products that have passed my rigorous testing enough to be “regulars” in the Kimball household, plus some other comprehensive reviews. Updated at least once a year to boot the losers and add new gems!


This is an old post and I’m sure you have figured this out by now, but you will get a better result if you use hard white wheat instead of soft. Hard wheat is to be used with yeast and soft wheat should be used with baking soda, baking powder, etc. Traditionally hard wheat was grown in the north and used for yeast bread. Soft wheat was grown in the south and used for biscuits and other quick breads.
Thanks for the tip and info Amy!
Oh my goodness! I’m sure I used “white whole white” which is hard wheat berries. I can’t believe that mistake has been in that recipe for so many years! Thank you for catching! 🙂 Katie
Pingback: Gossycrafts
It would be great to sour sprouted flour BUT… if you do this there will not be enough gluten to hold your baking together. Perhaps this would be a good time to use vital wheat gluten???
Do you think this could work with a sprouted grain flour?
Alisha,
I don’t see why not – I usually just try sprouted flour in any recipe I feel like and haven’t totally had a disaster yet. 😉 If you try it and it works (or doesn’t for whatever reason), please let us know here. Thanks! 🙂 Katie
I did not try this one but am currently doing a sourdough bucket bread with sprouted grain that is fabulous. I am in love. I am feeding my starter with white bread flour, which I may try to change that at some point, but I think that is providing something the bread needs to be successful.. not sure. What do you think?
That’s awesome if it’s working! I’ve always heard that sourdough and sprouted flour are redundant (true) and some find poor results in the outcome of the bread (?). It would be cheaper to do sourdough bread, and sprouted when you’re in a hurry. 🙂 Katie
That was sort of inspiring! Totally unanticipated. Now I know what I’m going to do tomorrow 🙂
I was about to ask about the sourdough too! I might do some experimenting if I can make myself take the time for it soon. I’ll report back if i do.
Katie,
I realize this post is a bit old, but I’m looking for a WW sourdough recipe using this method and (of course) thought of you! Have you tried this using sourdough starter in place of yeast? If not, what amount of starte would you recommend to replace the yeast?
Shalene,
I’m not so good at experimenting w/sourdough…but I guess I’d start with a 1/2 cup or so to test it out. I do know that the GNOWFGLINS eCourse on sourdough has a “bucket method” sourdough – that’s another name for this method. If you’re interested: https://rl102.infusionsoft.com/go/srdoecourse/ks/
Good luck! 🙂 Katie
Katie —
I’ve been using the Healthy Bread in 5 recipe for over a year now and love it. But I’m beginning to become convinced that a little “extra soaking” might be a good thing. My only concern: does acid (whey, yogurt, etc) negatively impact yeast?
Bethany,
Great question and one I never even considered! I’ve never had a problem with it. When making cheese, it’s recommended to add whey to bread in place of water for added softness, so that’s something to lean on as far as info. Hope it works great for you to make a “tweak!”
🙂 Katie
You might want to consider the stretch and fold method using this same recipe. I bake it weekly for local restaurants so I do batches using 12 c of flour for rolls or a little more for bread. I soak half of the ww flour in the water, yeast, salt, honey and butter. I typically need to do it using the larger amt of yeast and let it raise for two hours. After letting the flour soak for up to an hour, add the remaining flour (which in my case is an equal amt of unbleached bread flour).
Mix in with your hands (no kneading required.)
Cover the container and let it sit for half an hour. Then with wet hands do the stretch and fold method (google it) every 10 minutes 4 times. This will give you the equivalent of kneading it but it will develop the gluten nicely.
Cover and let rise the two hours if using the larger amt of yeast or overnight if using the 1/4 tsp per 6 c flour. You can then shape and bake or refrigerate until needed (no pun intended.) If you want my complete recipe start to finish please let me know. I make and bake the equivalent of 3 recipes at a time which gives me 6 doz. large dinner rolls or 4 loaves of bread. It’s soft, nice and slightly sweet. They love it at the restaurants.
Blessings,
Linda,
I think that’s what I was reading today in Peter Reinhart’s book…I’ve copied your instructions in with the artisan in 5 recipe and will have to give it a try! 🙂 Katie
I haven’t tried soaking, yet (I have some whey, think I’ll give that a try), but I do let it rise over night (have you seen Lahey’s bread book?), and use less yeast than the Artisan recipe (the overnight rise allows the little yeasties to develop more, making less yeast necessary), with good results. The resulting bread has a less yeasty flavor to it and my family scarfs it up. I want to try soaking to see what happens, I think I’ll try replacing some of the water with whey and let it sit overnight.
I also bake mine in a cast iron dutch oven (also from Lahey’s book, though they are talking about this on the Artisan site), which traps in the steam for the first 15-20 minutes, then you remove the cover for the rest of the baking time so it will brown nicely…saves me the risk of a steam burn, or cracking my oven door by spilling water on it.
Susan,
Sounds like some great stuff! That overnight rise almost takes care of the soaking, but adding whey won’t hurt (and I bet you hardly notice a flavor change, if at all). 🙂 Katie
Hi Katie. I just checked out “Healthy Breads in 5 Minutes a Day” and it looks great. I already soak grains for most things but continue to use yeast for bread (until I learn sourdough) so this seems like a nice change. What concerns me is the vital wheat gluten. Is it harmful? Could it cause celiac disease? Also, I’ve read that MSG used to be made from wheat gluten due to the glutamate. Is that bad or would it be so low in glutamate it doesn’t matter? Thanks! I trust your input (no pressure!). Shannon
Shannon,
There are some theories about adding wheat gluten to breads that I’ll actually be exploring this Thursday with the gluten theme this week. So I’ll make you wait for that 😉 and say that I don’t know much about the MSG link. 😉 Katie
I just tried this and something is wrong–there’s no “stretch” to it, no gluten, it’s barely rising, the dough is crumbly, and the loaf I baked is way too dense and not done in the middle. I did use a pretty rough-ground flour and was surprised when my dough came out very wet, almost a batter, so I added more flour…is that where I went wrong? I’m not a super-experienced baker but I have made some successful bread before and this is just completely different. And now I have two loaves’ worth of dough in the fridge and am wondering what I can do with them.
Ally,
It’s been a long time since I made this recipe…did you soak it or make it the way the recipe started? My only 2 thoughts to salvage the rest are (1) try kneading to develop the gluten or (2) make small rolls so the center has a chance to get done, and eat them warm so they’re not feeling so dense and hard. It’s so frustrating when bread doesn’t turn out, isn’t it? Sorry ’bout that – Katie
The dough should be quite wet and sticky when mixed. It will stiffen up while it rises but it will always be a softer dough. It sounds like there was too much flour and possibly not enough time kneading/rising.
hi! i’ve made this bread twice now and absolutely love it! i was wondering, does this recipe work with milk alternatives such as almond milk?
and how would one go about adding grains and seeds and such to this recipe? 🙂
thanks!
Alexandra,
I haven’t played with the recipe much at all, to be honest, and I’ve never used almond milk. I would think water might be an even easier alternative, but I’m not sure. I’d point you to two resources from the authors: the book “Healthy Bread in 5 Minutes a Day” with many allergy adaptations, and their website http://www.artisanbreadinfive.com/ where they answer questions in the comments sections. Good luck! 🙂 Katie
thank you! and just to let others know, i made the recipe with flax seeds (about 1-2 tablespoons per batch) and it works really well if you mix the seeds in with the flour before adding the flour to the rest of the dough. this way the flour coats the seeds and they won’t get stuck together or sink. and i also did try almond milk and it worked just excellent!
Would buttermilk work instead of whey?
Lorna,
Yes, it should! Just use a Tbs per cup of water.
🙂 Katie
Fresh Homemade bread sounds fantastic – is it really as quick as five minutes a day though it sounds time consuming. They probably don’t count driving to the store to get the ingredients, or clean up when a 2 and 4 year old “help” make the bread. 😉
.-= Natural Health Goodies´s last blog ..My Green Smoothie Inspiration and a Green Smoothie Recipe to Boot =-.
Pingback: Lunchtime! An Ultimate Recipe Swap — Life As Mom
I have been cooking my way through healthy Bread in Five and absolutely love it! Your loaf looks so pretty…the perfect vehicle for some grilled cheese.
Hi Katie,
Love your website and yes I’d love a chance to win the book if you haven’t already given it away!
Sally
I have to say that soaking the olive oil bread from this book (Artisan Bread in 5) makes the best pizza crust I have ever tired. It is awesome!
I agree Katie, once you have made the recipes many times, you start to get a feel for the right consistency. If the dough is too wet to work with after it has risen, you can always add more flour.
I have used both whey and kefir to soak the flour over night, and I find that if you allow the dough (after the first rising) to sit in the fridge for at least 8 hours (better over night) it is even easier to work with. I use a mix of whole wheat and half white whole wheat when I make mine!
The point is, I find that many of the recipes in the book are super adaptable to soaking!
Hope you enjoy the book! 🙂
.-= Jenn AKA The Leftover Queen´s last blog ..Ladies Supper Club: Dishing Up Vermont! =-.
OK, yet again you have convinced me to try something new with your enthusiasm and clear instructions.
I have not yet achieved a good soaked sandwich bread, but the Pizza Crust recipe in Peter Rhinehart’s book, ‘Whole Grain Breads” has become my standby. I have the recipe on my blog with soaking directions. It’s the best homemade pizza crust I’ve ever had, very easy to work with and such great results!
http://trintje.blogspot.com/2009/10/best-whole-wheat-pizza-ever.html
Thanks for your series on grains – I’m learning a lot!
.-= Trina´s last blog ..Top Ten Favorite Things Right Now =-.
I have cooked so far many things… but until now I did not dare to make bread, but now I am ready … wish me luck
Hey! That’s me ;o)
Thanks for doing this, Katie! Spreading the 5min bread love!
Mmm… I’m enjoying some right now and I have another loaf about to go into the oven!
I’d love to answer any questions or help anyone troubleshoot ;o) I’ve been making this bread for a little while and have learned a thing or two 😉
~Shannon
.-= Shannon´s last blog ..Cream Colored Cocoon, Wrap, Pea Pod, Pouch, Bowl, Egg, Sling, Hammock, Newborn Baby Photo Photography Prop =-.
I want to try this again. Last time I left it in the fridge for almost a week by accident. To me it tasted really sour and didn’t rise well. Part of my issue was that last time I tried it i was not fond of sourdough (Since then I’ve become more accustomed to a slightly fermented taste.) I think that I’d try more of a baguette shape because the boule shape created issues for me – over done on the edges and under done in the center.
I wonder If I could use this recipe with barley flour. I have some barley that I’ve been dying to grind into flour and bake with.
.-= Zeke´s last blog ..Eat Natto Now! =-.
Zeke,
I’m not sure how many men out there are dying to grind their barley – you get props for that my friend! I actually have some barley flour that I’m dying to use but keep forgetting about. 😉
It would be worth asking at the Artisan Bread website/blog, as I think Jeff is pretty good about keeping up with answering comments.
🙂 Katie
As long as no one touches my wild oats I’ll be fine. 🙂 I’ll be sure to check out Jeff’s site.
.-= Zeke´s last blog ..Eat Natto Now! =-.
One thing I noticed over at the website for the book (when I went to get an additional entry in your contest) was that the amount of water changes depending on what flour you use. I tend to use Kind Arthur Flour which has a higher protein content, so they recommend using additional water. So you might want to take a look at the FAQ before you try again.
.-= nopinkhere´s last blog ..Memo =-.
Aha, thank you! My friend had mentioned that once you’ve made it a few times, you get to know what you’re looking for, so I should have waited before experimenting. 🙂 Katie
So glad you reveiwed this and hopefully there will be some educational comments! I’ve been reading about this book everywhere but like you, I didn’t want to “take a step back” so to speak with white flour or unsoaked whole wheat. I’ll have to try your soaked version. 🙂
Can you use sprouted flour?
I realize the postage is more, but could some of these giveaways please please please be available overseas?
Or could I provide a US address and convince a friend to send it to me?
I too am bummed that they are all US only. 🙁
Naomi and Sonia,
I have to go with what the sponsor offers, since they offer shipping, but guess what? I didn’t actually ask about Canada, and this one will at lest send there! I changed the rules at the post, too.
Thanks for asking!
🙂 Katie
Thanks so much Katie! I can send the book to my mom in Canada, but I’m so stoked about the Eco-giveaway being worldwide. I can’t even find stuff like that here!
Since the dough sits in the fridge for up to a week, would the phytates break down naturally when it’s in there “fermenting?”
.-= Wendy (The Local Cook)´s last blog ..Baked Oatmeal =-.
Wendy,
The enzymes only activate at certain temperatures, and the fridge would be too cold. I wish – that would be great!
Katie
Hi! I found the book at the library yesterday and while reading the front section of basic instructions it does say about the initial rise on the counter “Longer rising times, even overnight, will not harm the result”(p. 56). Wouldn’t that be long enough to qualify as a soak?
.-= marcella´s last blog ..Real Food Challenge Week 3 =-.
Marcella,
Yes! Should be! Best to add some whey or vinegar in place of some of the water. Seems this bread was made for soakin’! 😉 Katie
oooh…so why couldn’t we just leave it out on the counter instead/? jsut a thought. I tried this method a while back and my bread was so dense:( i still don’t know what I did wrong….
Tiffany,
My bread was pretty dense, too…I think you could leave it on the counter for overnight, maybe, but you’d risk overrising and using up all your yeast action, right? Worth a try though! 😉 Katie
I figured I’d better comment here, there might be some crickets chirping since everybody will be headed over to the giveaway post! :>)
Thanks for reviewing this – I’ve heard such good things about it, and I appreciate having them reinforced here! Whenever I come across something new, I’ve started wondering in the back of my head “I wonder what Katie thinks about this?” So, thanks!
.-= Lenetta @ Nettacow´s last blog ..Link Roundup – Poker Party Edition =-.
This sounds too good to be true! My breadmaking right now just revolves around my treasured breadmaker, but this is tempting me to try it without it!
Now if I just had a loaf pan…..
🙂
.-= Jackie´s last blog ..Chick Pea Macaroni Monday (and how to make greens less bitter.) =-.
Jackie,
That’s another great thing about this book – the loaves are meant to be free-formed, so you don’t even need a special pan!
🙂 Katie
That is so good to know!! I have lots of regular pans, and even some cake pans, but no loaf pan. I’m even more tempted!!!
.-= Jackie @ Munching Madness´s last blog ..Chick Pea Macaroni Monday (and how to make greens less bitter.) =-.